If you made friendship bracelets as a kid (or as an adult!), this weaving pattern should be familiar. If not, it might take a little practice before you get the hang of it. We've used different colors in our video to make the process easier to follow, but the sky is the limit when it comes to which colors or patterns you can use!
You will need:
Scissors
Old fleece blankets, felt strips or old t-shirts. The longer your material is, the longer your rope toy will be.
Instructions
Cut your material into 4 strips of equal size and length. Strips 4-5 feet long and 2-3 inches in width work best, but you can increase or decrease the recommended sizing depending on the size of your dog.
Line up one end of each strip and tie them in a secure knot.
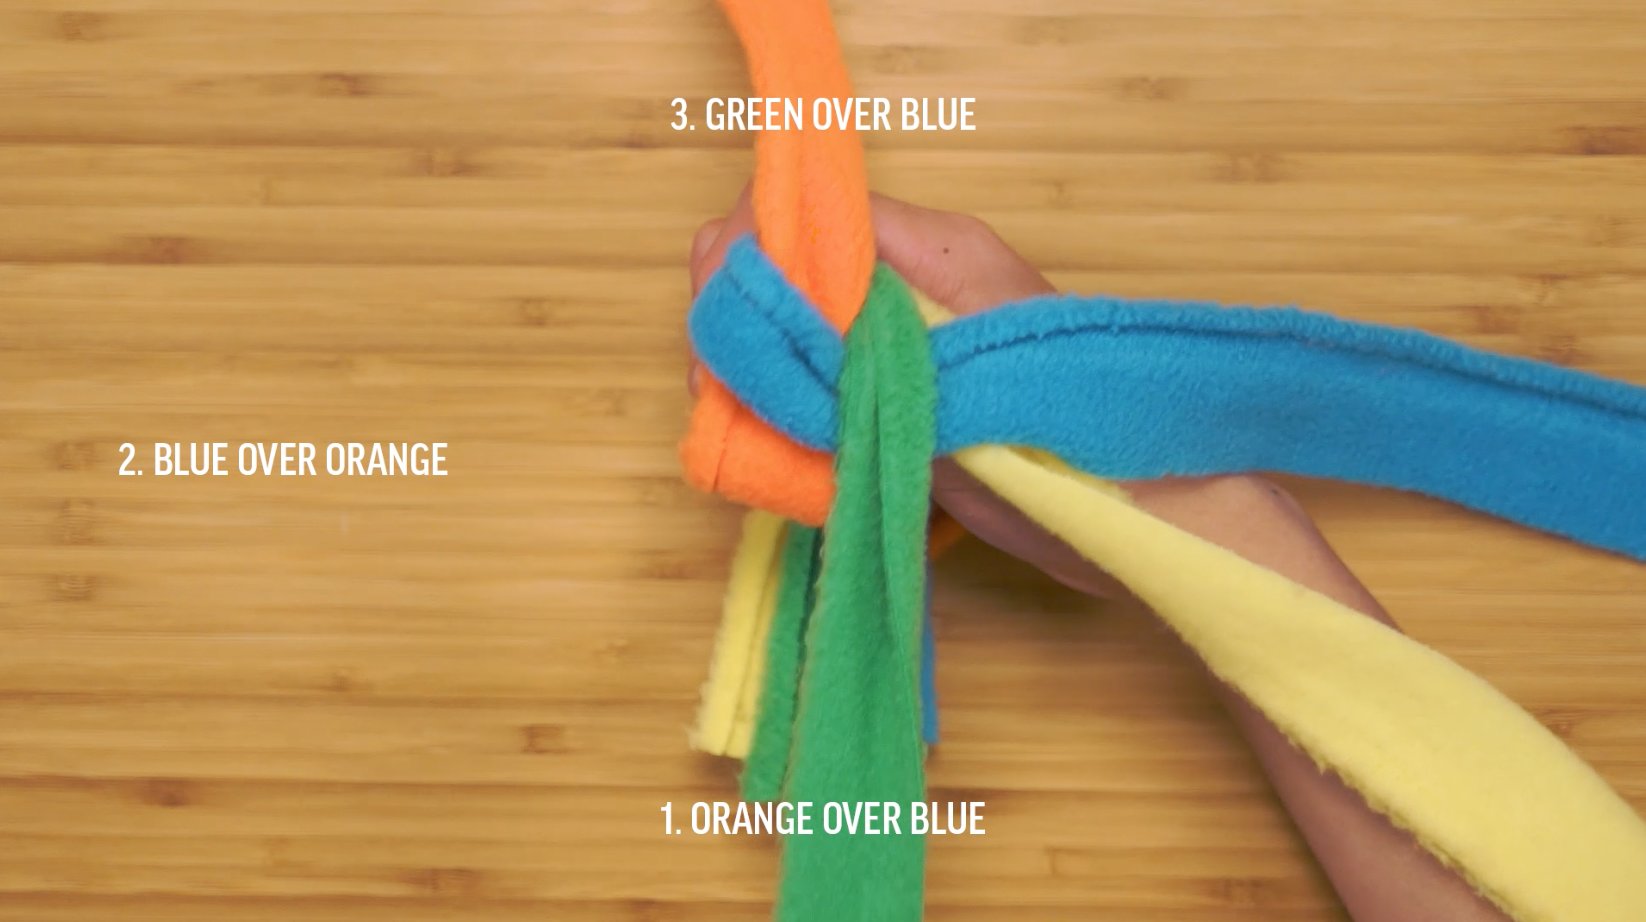
Hold the knot in your fist and prepare to start. Each strip will be overlapped over the one to its left, with the fourth and final strip being pulled through the loop created by the first strip's overlap. It can also make it easier if you identify each strip with the directions on the compass - North, East, South and West.
Overlap the strip closest to you with the one on its left, leaving it pointing away from you (South to North, overlapping West).
Use the strip on your left (West) to overlap the two strips that are now facing North, leaving the strip facing East.
Use the original North strip (in our video, green) and overlap the two strips that are now facing East, leaving the North strip facing South.
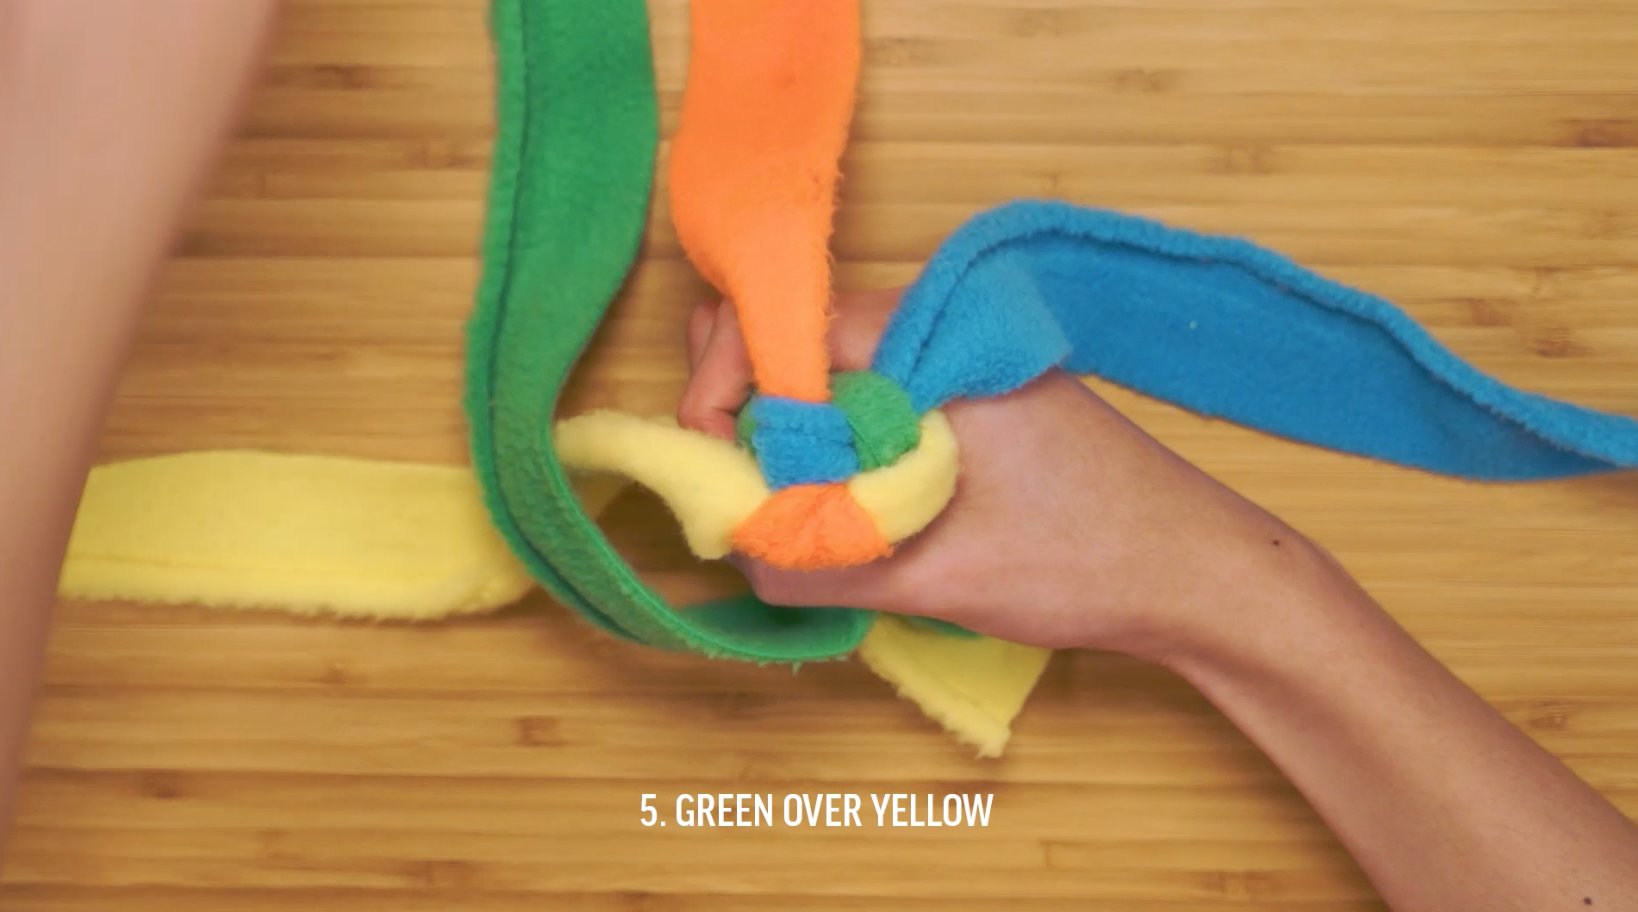
Finally, take the last strip and push it through the loop created by the very first overlap. You should now have one strip pointing in each direction as you did in the beginning.
Repeat the same process as above until a few inches of material remains.
Tie the strips in a secure knot to prevent it from unraveling.
Give the toy to your dog to enjoy and/or destroy!

 Use the strip on your left (West) to overlap the two strips that are now facing North, leaving the strip facing East.
 Use the original North strip (in our video, green) and overlap the two strips that are now facing East, leaving the North strip facing South.
 Finally, take the last strip and push it through the loop created by the very first overlap. You should now have one strip pointing in each direction as you did in the beginning.
 Repeat the same process as above until a few inches of material remains.
 Tie the strips in a secure knot to prevent it from unraveling.
Give the toy to your dog to enjoy and/or destroy!
Tie the strips in a secure knot to prevent it from unraveling.
Give the toy to your dog to enjoy and/or destroy!